React全家桶建站教程-发布
购买机器
- 这里以阿里云机器为例,其他云的机器也没问题,注意是 CentOS 系统即可。
- 如果没有机器的话,请购买。有机器请略过,直接往下看。


- 云盘:默认高效云盘 40G
- 下一步,默认配置,确认订单即可。
- 等待个 15 分钟左右,系统给你分配机器。
配置
- 修改密码
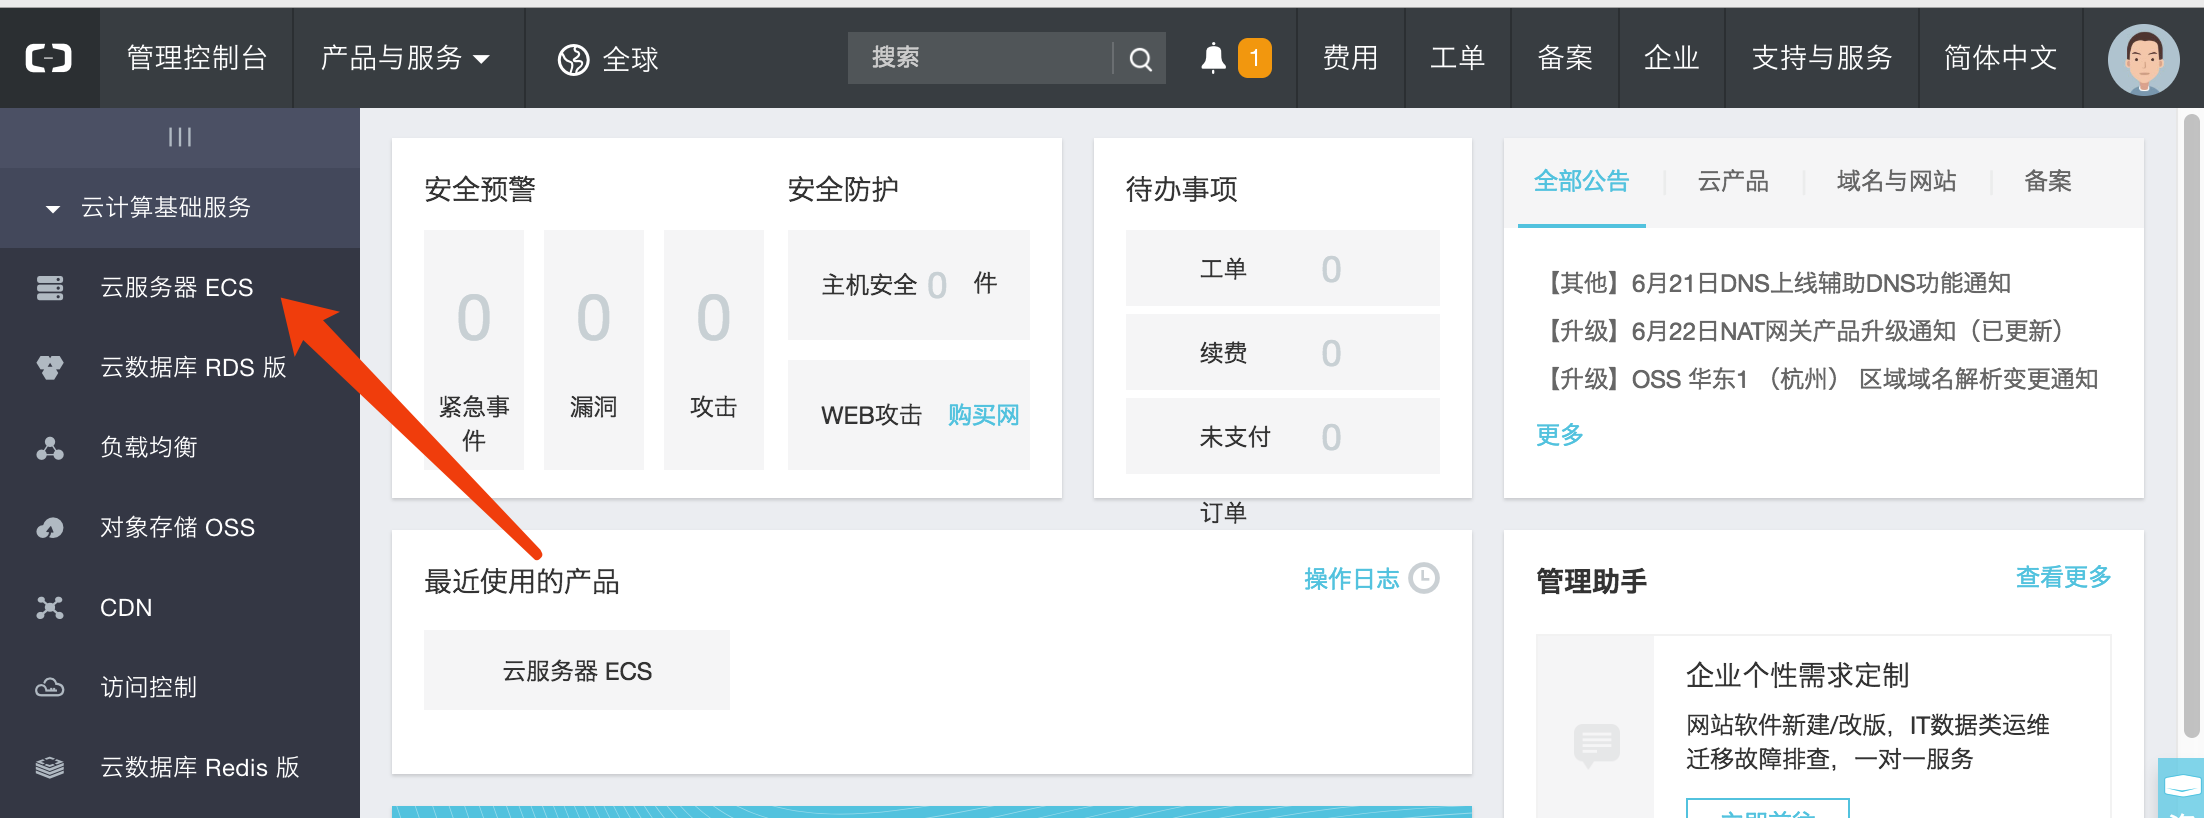 接着进入机器,选择实例。
然后点击管理。
修改密码在基本信息->更多->修改密码
接着进入机器,选择实例。
然后点击管理。
修改密码在基本信息->更多->修改密码 - 配置安全组
 点击本实例安全组,默认有一个安全组,点击配置规则。
 点击右上角的快速创建规则,配置-1、80、22 端口
22 ssh 访问机器的端口 80 让你的 ip 地址可以通过 http 访问 -1 代表不限制端口
登录
 通过机器公网 ip 和密码进行访问,访问成功之后会有上图提示。
安装
CentOS 自带 yum 命令,非常方便使用。
$ yum install nginx //安装 nginx
$ yum install -y lrzsz //安装上传下载命令。
$ yum install -y unzip zip //安装解压和压缩命令
$ yum install -y nodejs //安装 nodejs 和 npm
$ yum install git //安装 git 管理工具,会提示是否正确,选 y
查看安装版本
# node -v
v9.4.0
# npm -v
5.6.0
# nginx -v
nginx version: nginx/1.12.2
打包和上传
1、https://github.com/xuya227939/ak47 前端案例,可以直接打包的。$ npm i,$ npm run build打包,会生成一个 build 文件夹,压缩这个文件夹。
 这个文件夹存放了静态页面和 js
不想这么麻烦的话,这里提供了压缩包
https://github.com/xuya227939/blog/tree/master/examples/build
2、上传到服务器
这个文件夹存放了静态页面和 js
不想这么麻烦的话,这里提供了压缩包
https://github.com/xuya227939/blog/tree/master/examples/build
2、上传到服务器
$ cd /data/sight 我是放在这个文件夹中,如果没有的话,$ cd / 进入根目录,$ mkdir data,$ cd /data,$ mkdir sight,$ rz 上传文件夹
3、解压
 上传之后,你的结构应该看起来像上图的样子。
$ unzip build.zip 通过 unzip 解压文件
Nginx 配置
$ cd /etc/nginx 进入 nginx 目录
$ echo ''-> nginx.conf 清空 nginx.conf 的配置
$ vim nginx.conf 如果没有 vim 命令,安装一下 $ yum install vim
写入以下配置
user nginx;
worker_processes auto;
pid /run/nginx.pid;
include /usr/share/nginx/modules/*.conf;
events {
  worker_connections 1024;
}
http {
  gzip on;
  gzip_min_length 1k;
  gzip_buffers   4 16k;
  gzip_comp_level 2;
  gzip_types   text/plain application/javascript text/css application/xml text/javascript application/x-httpd-php image/jpeg image/jpg image/gif image/png;
  gzip_vary on;
  log_format  main  '$remote_addr - $remote_user [$time_local] "$request" '
                      '$status $body_bytes_sent "$http_referer" '
                      '"$http_user_agent" "$http_x_forwarded_for"';
  sendfile            on;
  tcp_nopush          on;
  tcp_nodelay         on;
  keepalive_timeout   65;
  types_hash_max_size 2048;
  include             /etc/nginx/mime.types;
  default_type        application/octet-stream;
  include /etc/nginx/conf.d/*.conf;
  server {
    listen       80 default_server;
    server_name  localhost;
    root         /data/sight/build;
    include /etc/nginx/default.d/*.conf;
    access_log  /data/logs/access.log  main;
    error_log /data/logs/error.log;
    index index.html index.php;
    location ~ .*\.(gif|jpg|png|jpeg)$ {
      access_log on;
      expires 30d;
      root /data/images/;#指定图片存放路径
      client_max_body_size    10m;
      client_body_buffer_size 1280k;
    }
    location ~* ^.+\.(eot|ttf|otf|woff|svg)$ {
      access_log off;
      expires max;
    }
    location / {
      root /data/sight/build;
      try_files $uri /index.html;
      proxy_set_header X-Forwarded-For $remote_addr;
      proxy_set_header Host $host;
      index index.html index.htm index.php;
    }
    error_page 404 /404.html;
      location = /40x.html {
    }
    error_page 500 502 503 504 /50x.html;
      location = /50x.html {
    }
  }
}
启动 nginx
$ service nginx start //Redirecting to /bin/systemctl start nginx.service 提示这个,代表成功。
然后访问下你的公网 ip,试试?
 出现这个,就代表发布成功啦!!!
注意
每次修改完 nginx.conf 文件之后,都需要重启才可以生效噢。
$ service nginx restart
问题处理
- 无法访问此网站。可能是 nginx 没有开启
- Permission denied, please try again. 解决办法参考https://help.aliyun.com/knowledge_detail/41487.html
- 如果访问某个 ip 地址的端口,无法访问的话,安全组没有开放该端口
结语
是不是感觉到非常简单?